Showing posts with label crafts. Show all posts

Tuesday, November 14, 2017

DIY 3D Portholes

Recently, I undertook the task of completely making over my son's room. I have to say, I had a lot of fun redesigning this room. Even better was his reaction to the transformation. Slowly, I am accomplishing small projects to really make his room pop - like these DIY portholes! 

I originally suggested having porthole vinyl decals next to his bed so it appears he is looking out to sea. He loved the idea. Then I had a conversation with my father, who suggested 3D portholes would be more realistic and way cooler. Why are you trying to create more work for me Dad?(Even though your idea IS awesome)

Rather than go through the trouble of cutting perfect circles out of plywood, I decided there MUST be something circular on this planet that I can use instead. I also researched the web for ideas and surprisingly really didn't find much help. So, this project was entirely all guess work and pure luck. Which explains why I had to redo them multiple times after trial and error. 

This tutorial will provide the basics, optional material and what ultimately worked for me. What I envisioned was a 3 dimensional porthole with material that mimicked glass and rivets as well. The hardest part was finding what looked like glass, but wasn't glass, that I could cut. Clear acrylic sheet! Who knew this existed? Because I totally knew, just testing you. Honestly, I cannot even remember who first enlightened me to its existence, but this is the part where you bat your eyes at someone with knowledge of a jigsaw and ask them to please cut circles for you (or do it yourself if you're so inclined, but I wasn't).

Wednesday, October 11, 2017

Nautical Sign

In recent years, my son has asked me to redesign his room because he felt that Thomas the Tank Engine was too baby-ish. This year I finally committed to redesigning his room and what is more perfect that a nautical theme when you live on the coast? 

We came across a framed sign at Hobby Lobby that my son loved, with a whale and a quote from Psalm 93:4, but it was $60. Um no. We wanted it so bad though! How cute it would be to hang just over his headboard. So, I thought to myself, maybe I can make one. I turned to my son and said..I will make it. 


Thursday, October 29, 2015

Homemade Angel Wings


After much debate over this year's Halloween costumes, my daughter decided to be an angel. Great! A white sheet, cut to fit, easy. Angel wings? How in the world do you make angel wings?? I of course Googled this. I found a site with instructions for DIY wings. I went and purchased 12 gauge wire and white pantyhose. The instructions said to shape the wire into your desired wings. The whole time I'm shaping this wire I am thinking to myself, this bends way too easy. How in the world will it hold it's shape with pantyhose stretched over it? But, whatever. The site had drawings and everything, so it must work. Well, my gut was right. The second I tried to put pantyhose over the wire it bent all out of shape....and I'm using my nice language on here. My daughter looked horrified and worried that I could not produce the cool angel wings she so desperately wanted for her costume. 

So after a few choice words and then finally back to logical thinking I decided...FINE...we need wire that doesn't bend? Easy. I have a closet full of stupid wire hangers that I can't stand! I pulled 2 hangers out of the closet and my daughter looked so skeptical and sad. She said that won't look good, it won't work. Wanna bet? Challenge accepted!!

I am going to be as descriptive as I possibly can. I did not take a lot of photos. I had no idea I would even blog about this until I was done and thought holy crap these look awesome!! So, here's what works in real life.

Items you will need:
2 wire hangers
Electrical tape (even duct tape would work)
Pipe cleaners (those little furry wire thingys for crafts)
White pantyhose (queen size)
White Christmas garland
2 feather boas
Hot glue gun
White elastic for the straps
Scissors
Wire cutters

Friday, March 27, 2015

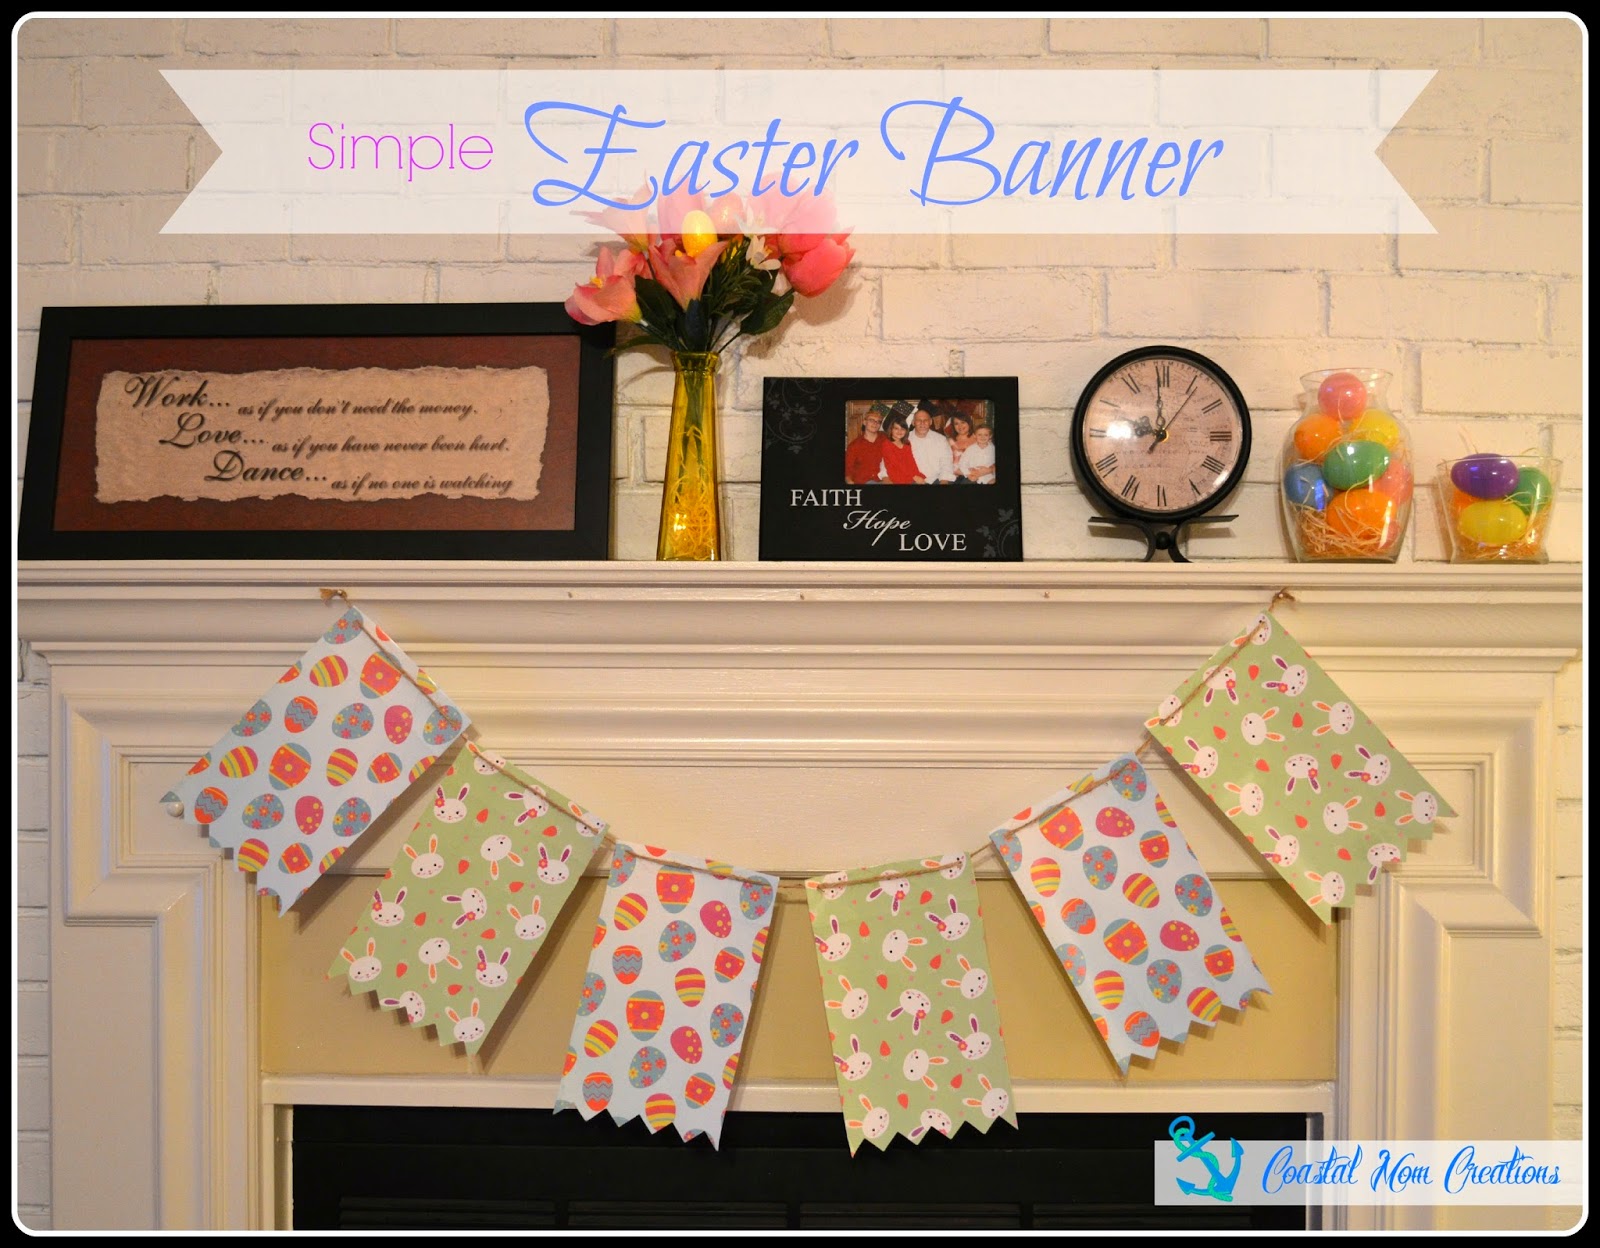
Easter Banner & Decor


I definitely cannot take credit for this super cute Easter banner. This was all my sister's idea. She swears she's not crafty. I beg to differ. But, she was completely delighted with herself when she created this Easter banner for her photography backdrop. Check out her Southern Reflections Photography Studios Facebook page HERE. I was so excited when I saw her banner, I just had to have the same one for my mantle! Being that she's such a wonderful sister and all, she mailed me her leftover supplies :)

The best part about this banner is how cheap it is to make! All you need are Easter gift bags, twine, scissors and a single hole punch. She found the Easter gift bags at Fred's for 25 cents each.


Cut off one side of the bag and hole punch both corners. Run your twine through each and voila!


My other Easter decor was ALL from the Dollar Store. How cool is it that they sell glass vases, votives?! As you can see, a very easy and cheap way to decorate for the holiday!


Thursday, February 26, 2015

Frozen Birthday Party


Where to begin with this one...?! This was by far the most extravagant birthday party I have ever had for one of my children. This was my version of a Pinterest-y winter wonderland on a budget, for my daughter's 11th birthday. It's not as nice as some of the elaborate parties I've seen on Pinterest, but hey we can't all be rich ;)

THE most important thing about your child's party, is YOUR CHILD. Having 20 friends over and throwing a block party, like you see in every movie, is not my daughter's personality. Having a couple close bff's over to spend quality time, is more her speed. Once all the grandparents, aunts and uncles arrive you have a house full anyway. 

I compiled all the ideas I had researched and made my game plan. I used blue and white plastic tablecloths to decorate with. My daughter made snowflakes out of coffee filters. I bought any serving dishes I needed at The Dollar Tree or Party City for $1 each. The tumblers were a great clearance find at Target thanks to my friend, Melanie!

Giving all the food Frozen inspired names seems to be a popular Pinterest pin. We incorporated that into our theme as well. Two food items we added were Kristoff's Ice Blocks and Hershey kisses. I did see a bowl of blue jello with an "Olaf floating" on top and I almost did that but instead decided to cut the jello into cubes for ice blocks.

FROZEN Themed Food:
Kristoff's Ice Blocks - Blue jello
Olaf's Snowman Arms - Pretzel sticks
Elsa's Icicles - Rock candy
Sven's Carrots - baby carrots
Elsa's Snow Dip - Ranch dressing
A Kiss to Melt a Frozen Heart - Hershey kisses
Blue Party Punch - courtesy of Comfy in the Kitchen

Wednesday, February 11, 2015

52 Things I Love About You


With Valentine's Day just around the corner, I thought I'd share this special project I made a couple years ago for my husband for Valentine's Day.

I found the tutorial and idea at Visual Heart. She even offers a template you can download and add your own text. 

To start with you have to come up with 52 reasons you love them! I used some of Visual Heart's ideas, but mostly I added what I felt I needed to say and what was special in our relationship. 

Because I always have 2,873 tabs open in my mind, I have to write it down and organize my thoughts. I'm old school and still put pencil to paper. I used Microsoft Word and created my own template and typed them up. I chose to use rubber cement instead of Mod-Podge and it worked great. I found the binder rings at Michael's.

My husband really loved this gift. It's from the heart. It's made from your hands and not bought in a store with someone else's words.

As I type this..... he leans over and says aww you made one like that for me! Yes dear, this IS yours. Haha....

Wednesday, February 4, 2015

Canvas Silhouettes


I saw the idea for canvas silhouettes of facial profiles in a brochure from Lowes or Home Depot, can't remember which. I thought what a cool idea this would be to incorporate into the Tween Zebra Room?! My daughter is in love with all animals, esp exotic or wild animals; i.e., lions, tigers, zebras, wolves. 

The brochure had a very brief description of how to make a silhouette using spray paint: spray paint the canvas 1 color, lay down your silhouette and spray over it. Tada! Sounds easy enough right? Not. So, through trial and error I came up with my own way. 

I followed their short, indescriptive directions initially. I had no idea how to make the silhouette stay in place without blowing away with the first spray. So I thought to myself...painters tape. I put a little underneath the silhouette I had cut out and sprayed away. This was my result :(


Plenty of over spray AND you can see were the painters tape had been holding down the ears.

Disappointed, I stopped there and finished up other projects. I told my husband about my dilemma and he suggested weighing the image down AND I figured out how I had so much over spray initially. So here's my step by step instructions on what worked for me.

Saturday, January 24, 2015

FROZEN Mason Jar Candles


Coming up next month is my daughter's Frozen birthday party. I have many things I have to make happen between now and then, including completing her Tween Zebra Room, since she has pleaded for it to be finished so she can show off to her friends ;)

To kick off the Frozen party crafts and decor, I created these Frozen mason jar candles. I got the idea for mason jar candles at www.thefrugalgirls.com. They created some very cute jars for winter decor. I just needed to incorporate a Frozen theme...simple!

I don't have a die cut machine as used by The Frugal Girls but they also suggested stickers. I found these glittery blue letters at Michaels on clearance for 99 cents. Score!

Items you'll need:

Mason jars
Epsom salt
Letter stickers
Tealights
Ribbon

This project only took 10 minutes and they look so good! In my opinion, the stickers are the way to go. First off, it's super easy! Second, you can interchange the quotes and ribbons for each season. I may just keep them up and change them when this party is over. Another reason I like using stickers - I am not fully committed to my mason jars having the same lettering on it forever lol. I am stingy with mason jars and I like being able to reuse them :)

What quote or saying would you put on your mason jars?

Wednesday, December 17, 2014

Quick & Cheap Christmas Gift Idea

Great for office parties, family gatherings or party favors for your guests!


This Christmas gift idea is inexpensive and super quick.

We did this last year for a local children's shelter and they were a hit! So, this year we made the same gifts. Mugs are easy enough to come by in dollar stores, consignment shops and yard sales. Since ours were for charity we had our mugs donated from the community.

I think it's important for my children to understand what the meaning of Christmas truly is and also learn how to help others. They have enjoyed putting these treats together and I'm sure we'll make it a yearly event.


You can add anything you want to your mugs. Since I'm filling approximately 25 mugs I try hard not to spend a fortune. I also have friends, family or co-workers who like to contribute to this cause. But what I do buy myself is Dollar Tree or Walmart. You can get Swiss Miss or Nestle hot chocolate from dollar stores, red and green plastic spoons. This year someone donated a variety of tea flavors so we added those to the mugs for the staff. Pick up a bag of candy, divide it up and wrap it up with colored plastic wrap and tie with Christmas ribbon.


I put the mugs full of treats inside a decorative Christmas treat bag. I add popcorn inside each treat bag since it's something the shelter likes to have for movie nights with the children. 


If you have suggestions on what treats you'd add please comment below! 


Saturday, December 6, 2014

Chevron Wooden Monogram Letter - Door Hanger


This is such a simple inexpensive craft to spruce up any interior or exterior door. I found this monogram letter E in a clearance bin at Michael's for just cents. It's made of MDF instead of real wood, but for this tiny project who cares?

My daughter is in love with the new craze for chevron patterns and just had to have this in pink and black to match her new Tween Zebra Room, slowly but surely "under construction". 

For this project I used a stencil I purchased from Amazon. Way easier than taping off a million zigzag lines! I got 2x 12" stencils for $6, so definitely a good deal and worth it.

I used Valspar spray paint in black and hot pink. 


I spray painted the monogram letter entirely in black. Remember to spray the edges as they will be seen. Always spray in a well ventilated area or outside.


Once fully dry position your stencil where you want it and spray your secondary color.


I bought some zebra wire ribbon at Michael's with a 50% off coupon and used a hot glue gun to glue both ends to the back of the letter. If you have a staple gun you could use that as well as long as you use a short staple, approximately 1/4 inch. Snip the ends at the top of the ribbon so you don't have a blunt straight edge. Nice!


Wednesday, October 1, 2014

Bigfoot Birthday Party

Doesn't get much funnier than that LOL

September was a crazy month and I spent more time preparing for this party, the presents and home life in general that I didn't get 1 piece of furniture completed, or even started for that matter, for the Tween Zebra Room. I promise I'll be back on that project soon!

In the meantime I wanted to share this awesome Bigfoot Birthday we managed to pull off for our 7 year old son! Normally I let them pick a theme, but this year we surprised him with Bigfoot! My son watches every single episode of Finding Bigfoot and is fascinated with the subject.

After checking Wal-Mart, Party City and online sources, I realized NO ONE sells Bigfoot party supplies. I actually found that surprising considering how popular the show is, especially here in the south. I did find some cupcake toppers on Etsy, but it was nothing any crafty woman couldn't make herself lol.

For the first time ever I had to create the entire birthday theme. I wouldn't go as far as to say it was hard, but it was definitely more work than I usually put into the decorations. This required a lot more thought, research online and Pinterest ideas. Pinterest had several pins regarding Bigfoot parties that others had put together. Some appeared rather elaborate and pricey but this mommy is on a budget.

I took all this knowledge and made a game plan for our party. The one thing I didn't see any where were parties held outside at a "campsite". Isn't that where most people see him lol? They're out camping one night, all of a sudden....you know the stories :)

So, I decided I would make my front yard a campsite and also post Bigfoot signs on nearby trees. I bought red and white checkered tablecloths for the tables and set up chairs. I don't own an actual camping tent, but I did have a beach tent...whatever works lol. Borrow a tent from someone if you need to, I promise the kids really will enjoy this outdoors theme.

Tuesday, August 19, 2014

ALWAYS BE BATMAN Boys Canvas Wall Art


I've seen this quote around a few times recently and thought it was hilarious. When I ran across this again as canvas wall art on Etsy I showed it to my 6 year old son, who giggled ;) I decided I would attempt to make it for him since I'm not going to spend $15-$29 for it and I had recently pinned a tutorial for adding quotes to canvas!

Wednesday, July 30, 2014

Mason Jar Hand Print Vases

These vases were soooo easy to make using mason jars! I ran across this idea on Pinterest right before Mother's Day and incorporated this fun craft into my Sunday School class :)

Here's the original link to Christina's Adventures who posted these adorable mason jars!
I personally think her name is quite awesome.


I've seen a lot of mason jar craft ideas and different ways to paint them. For this project however you'll want to paint the inside of the jar since little hand prints will be on the outside ;)

Tuesday, July 1, 2014

4th of July Fireplace Craft Decor


I've never been one to decorate my fireplace seasonally, but after revamping my fireplace last year, I can't help but decorate!

My kids helped me create these Quick and Easy 4th of July Crafts. I bought the cool cardboard stars from Party City for $8.99. With the help of my "mini me" we easily designed a very patriotic fireplace!

Quick and Easy 4th of July Crafts

Show your holiday spirit!


I sprayed painted an old mason jar and hand painted some white stars. I added my patriotic bling that I bought from the dollar store and voila! 


My "mini me" wanted red and white flowers from the dollar store too, so I spray painted an old flower vase so she could display patriotic flowers.


I found this idea on Pinterest and my kids LOVED creating their own flags from craft sticks! I'm not sure how the ones from this picture were created and I think we did ours a little different. I hot glued 2 small craft sticks vertically on the back to keep everything together. The kids painted all their pieces themselves and after I glued it all together they applied star stickers.


This 4th of July Patriotic Paper Chain from Love the Day is awesome! She has a free printable on her site! My "mini me" helped me create this patriotic chain in under 30 minutes. It really makes our fireplace pop!


Click here to see how I put all these crafts together to decorate our fireplace!

Monday, May 26, 2014

Patriotic Windstock for Memorial Day/4th of July


Patriotic windstocks are great decorations for holidays. It's simple, cheap and easy for children!

Items I used:
1) Blue plastic cups
2) Star stickers
3) Paper streamers
4) Tape
5) Yarn or string

Apply star stickers to plastic cups, cut paper steamers to your desired length. Poke a hole in the bottom of the cup. Cut a piece of yarn and poke both ends through the hole in the cup. Pull through and tie into a big knot. Tape the paper streamers into the inside of the cup and you're done!

Sunday, May 25, 2014

Children's Art Gallery

Really cheap and easy!

I bought 2 yard sticks at Home Depot (roughly 68 cents each) and spray painted them black to match my son's bedroom furniture. I had clothes pins on hand (no idea how I acquired them lol) and spray painted them silver. I redid my son's dresser in black and silver so this matches perfectly.

I used Gorilla Glue to glue the clothes pins in place. I would recommend Super Glue instead since Gorilla Glue expands and I can actually see the glue on this. I'll be sure to use super glue when I make my daughter's.

Be sure to space your clothes pins appropriately. I just eyed it visually with a sheet of 8.5x11 paper.

Drill two small holes into each yard stick and then screw them into place using a leveler. Drilling small holes in advance prevents the wooden yard stick from splitting when screwed into the wall. Dab some matching acrylic paint over the screws and you'll never seem them!


Beach in a Jar!

I found this awesome idea on Pinterest courtesy of www.thefrugalgirls.com!

I have several mason jars sitting around waiting on something creative to happen to them. I also live minutes from the beach! My kids did not complain a bit when asked to find shells for this project lol. 


I spray painted the lid to the mason jar instead of gluing twine, as shown on the original post. I cut a piece of orange rope we had lying around and with the kids help, we hand picked the best shells and made our Beach in a Jar :)


Friday, May 23, 2014

Terracotta Jewelry Tower/Stand

I originally saw this idea on Pinterest, however there was no link to find directions on how to create it. This is super easy and anyone can do it!

Two really neat things about this tower:
1) It has many different uses
2) You can create it so many different ways, just by choosing different sizes for your terracotta pots and saucers.

Items I used:
1) Terracotta pots
2) Terracotta saucers/pots
3) Glorilla Glue
4) Acrylic craft paint/paint brush
5) Sanding block (rough grit)/optional
6) Glossy spray on clear coat
7) Self-adhesive craft felt/optional

I purchased my terracotta on sale at Home Depot and bought a tube of craft paint at Michael's. I chose Gorilla Glue since it works on porous surfaces. Everything else I had on hand :)

First arrange your pots and saucers to decide how you'd like the finishing product to look. Follow the glue instructions and glue all the pots and saucers together. I've since read that some others who have made these, choose not to glue all their pieces together. Whatever you prefer, be creative!

Once glue is set, paint the entire piece with the craft paint you chose. I wanted my tower to appear "antique" so I sanded edges and surfaces with a rough grit sanding block to remove a little bit of paint and add character to my piece!

To protect your tower I would definitely spray a clear coat over the entire piece. I used glossy since I already had that on hand.

Lastly, if you choose, add some self-adhesive craft felt to the bottom to prevent the tower from scratching surfaces. I definitely didn't want to scratch the paint on my new-ish "mud closet" I had just made!


As you can see, I chose to use mine for all my husband's junk lol. I keep this right at the front door so he can deposit all his belongings ;)