I know this is pretty unconventional, but I certainly didn't want to waste a good piece of furniture. This is an old mirrored shelf from an outdated dresser. I bought the dresser to makeover, which is still on my "to do list". These old dressers usually sell better without the bulky mirrored shelves. I originally considered turning this piece into some type of foyer storage shelf with hooks for jackets and coats. I even saw someone on Pinterest who turned hers into a hutch on the wall. Nice! I felt this piece was too heavy for a wall though.
It is the perfect size for a fireplace however! In the deep south we really do not have the need for a fireplace, yet they are so pretty to decorate with. I love my fireplace just for it's facade. I rarely actually utilize it though. So, I assume others out there would find this faux fireplace convenient. Nice soft glow of fire, without all the mess, and a mantle to decorate!
In all the excitement, I forgot to take a "before" picture. This is as close as I got. I barely started so we'll say it counts. As you can tell I had already removed the mirror. We'll get to that in a bit.
I used Glidden Antique White latex paint. I found this ready made color in a sample size at Walmart. I had no idea they sold premixed colors!
I made my own chalk paint again. Here is my recipe if you'd like to make your own as well. After the first coat dries lightly sand with a very fine grain sandpaper. I personally like to use 400 grit. Using a clean cloth, wipe down the entire piece after sanding.
However, I was not worried since I intended to apply a dark wax. For full instructions on how to apply clear wax and dark wax click here. I like to use SC Johnson Paste Wax as my clear wax. Easy to find in your local hardware store.
As for the dark wax you can certainly purchase your own. If I can make it myself though, I usually will. I made a dark wax when I re-purposed an old 2 drawer chest for a friend. I still had this on hand so I used it for this piece. Click here for my DIY Dark Wax instructions.
One of the important steps you'll read on how to apply dark wax is that you must apply a coat of clear wax first. There are two options to doing this and I note all of the instructions and the reasons why in my previous post.
Since I had the day to myself to complete this project I applied both my waxes the first way, which is applying the clear wax first and then applying the dark wax while the clear is still moist.
In the above photo you can see where I've applied dark wax on the top of the shelf. If you've never applied wax before you can read about how to in my post mentioned above. There is also a great video on my post from The Purple Painted Lady. She has great video tutorials!
Now to the mirror! This was by far the easiest thing I've done.
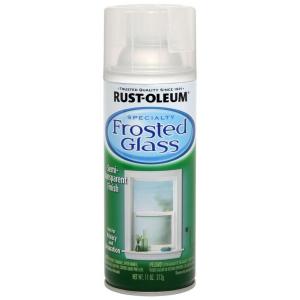
I purchased Rust-Oleum Frosted Glass in a spray can. Easily found at Walmart or hardware store.
I simply followed the directions. Easy breezy.
After the wax dried I had my handy dandy husband reinstall the mirror. I could have done it myself but, why?
To be honest however, he's very intelligent and I knew he'd reinstall it without shattering the mirror, because lets face it, I can be a putz at times :)
I'm delighted that this faux fireplace found a new home in a cozy guest room.


No comments :
Post a Comment